I know we are ((ALL)) complaining in our area that Christmas stuff was reaching our local stores in July. Summers at it's peak and they want me to think snow, cocoa and fireplaces. The only real connection I was feeling with that line of thinking was with the fire and the 102 (F) Degrees heat index we had here in Indiana today old frosty would have melted and roasted his chestnuts. However it is never to early to craft! I'm pretty sure old Martha baby (aka Martha Stewart) probably starts Easter 3 years ahead of time so she can find her swiss chocolate eggs and Pastel dipped french yodeling bunnies in time for her family to visit...yup thats a good thing. (It's all fun and games until some bunny poops) yes I had to throw that in.
I know we are a group of crafters here and we love to make our homemade gifts (normally using our Silhouette Cameo..or other cutting machines) however today we are kickin' it "OLD SCHOOL" we are using scissors (gasps) and let me tell you the end result is so worth it! Let's get started making our OlliBlocks. With a few simple steps you will have a wonderful classy and best of all homemade gift.
What are Olliblocks they are small wooden blocks with pictures on them. You can switch the blocks head, body and legs around to create silly monsters, animals, superheroes and more. (each side of the block has a different unique and fun image) both my 2 year old and 6 year old son love these so the blocks are great for a wide age range.


For this project you will need to log onto the Caravan Shoppe Website found here
http://www.caravanshoppe.com/product-category/toys/
right now there is a sale going on spend $50 and save 30% with code caravanconfetti
Look for Toys and select and purchase the Ollieblocks pdf printable file of your choice.They have several really terrific options! Then download and print the pages.
SUPPLIES:
1.5" or 2" wooden blocksHobby Lobby carries some wood blocks
However I have a handy hubby who cut me some wood blocks from a 2"x2"x36" poplar board (around $6 makes 17 qty blocks) from Lowes (though the label says 2x2 it's really almost exactly 1.5"x1.5") and I sanded them and painted them
(Caravan Shoppe recommends craftparts.com)
*If you cut your own blocks*
you will need a table saw
:-) proper safety gear
electric sander
I used 220 fine grit sand paper
and I painted my blocks before applying the images
I used that convicted felon paint (Martha Stewart Satin)
colors are pool, carrot, arrowhead, scottish highlands, rubber ducky
and Apple Barrel brand paint in flag red


full-sheet label (sticker) paper or card stock
I printed mine on 110lb. weight cardstock at home (hp inkjet)
CARVAN SHOPPE SUGGESTS: You can print this from home on your home printer but be aware the the colors will probably turn out
darker and more muddy when printed on a home printer.
PRINT SHOP: You can print from the PDF at a local print shop. Caravan Shoppe uses FedEx Office or Alphagraphics. Printing at a
print shop will give you a nicer, richer result. They recommend printing these on full-sheet label
Scissors
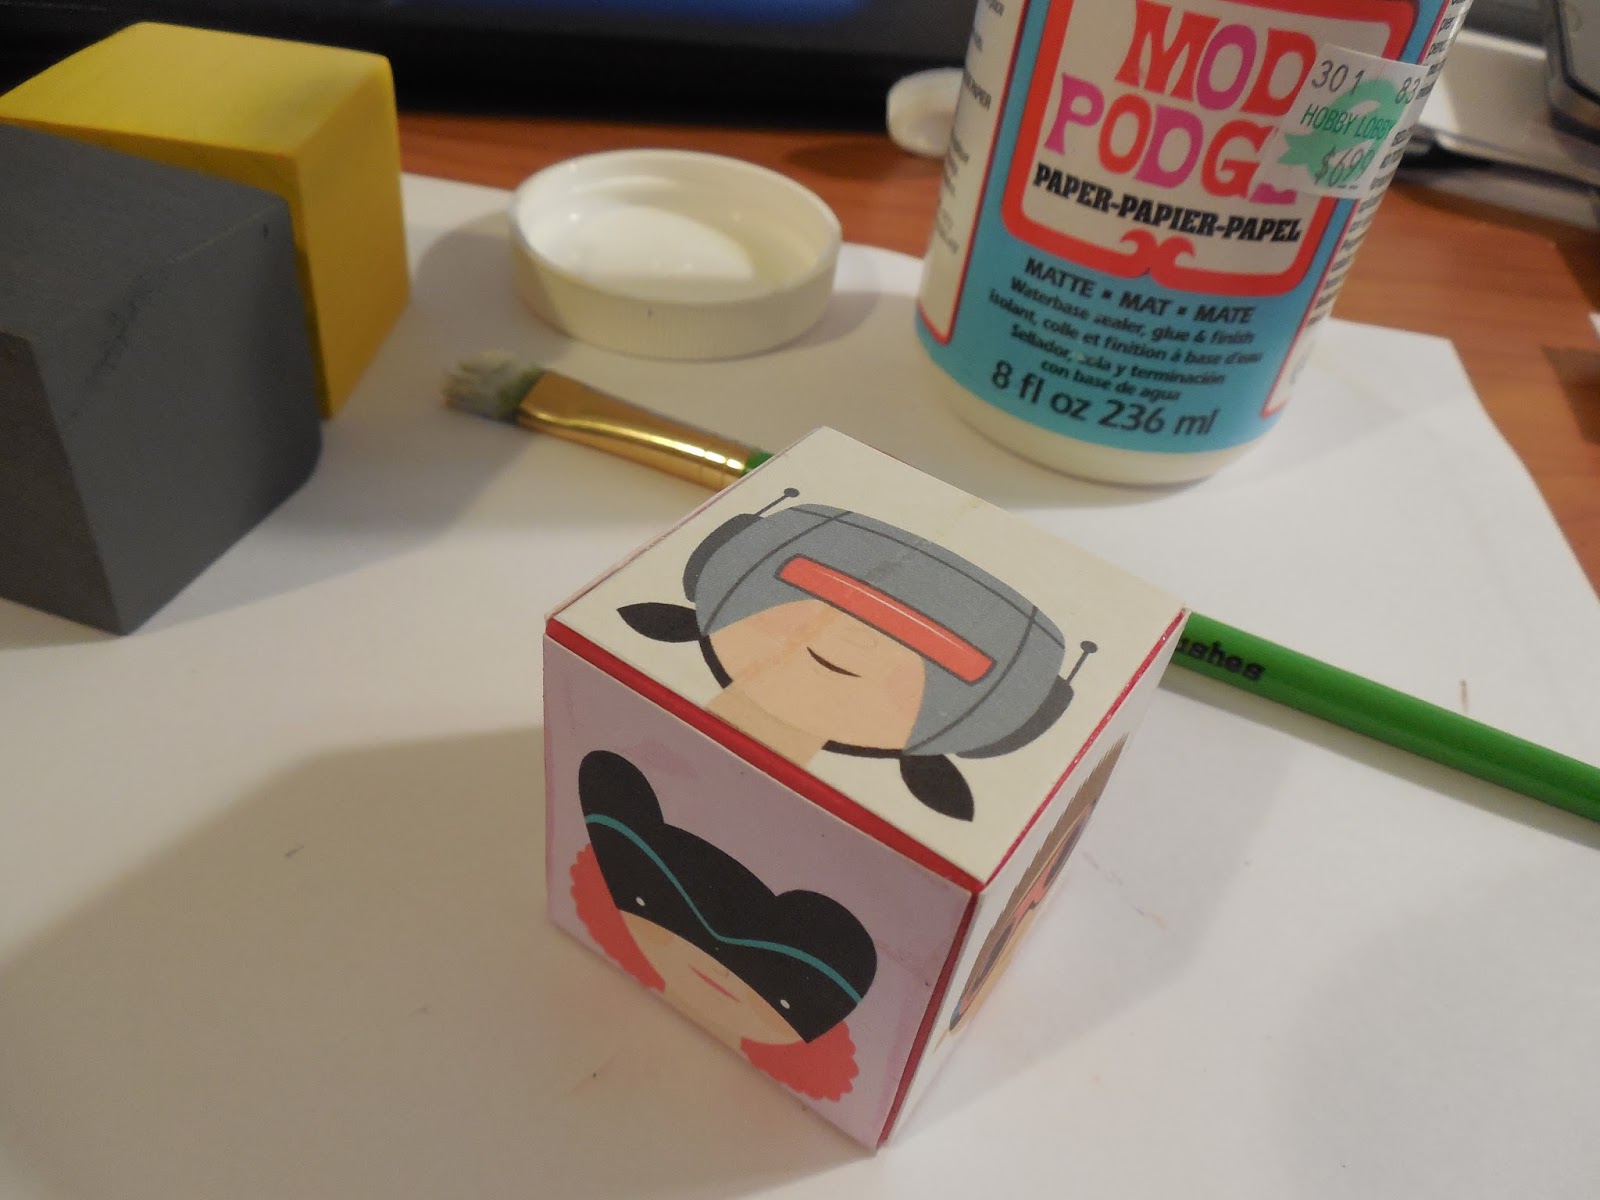
(Matte)mod podge
INSTRUCTIONS:
1) Print the artwork onto full-sheet sticker paper or card stock.

2) Cut each square out carefully with scissors or an xacto knife.

3) All heads should go on one block, all bodies on another, and all legs on a third block.

I brushed on a medium thick layer of (matte) Modge Podge.
Line up each paper square with a side of the block.

The blocks may vary in size slightly, so you will
probably have to further trim down your squares to help them fit more perfectly. Instead of trimming I was going for a worn vintagy rough look so I used a scrapbook paper sanding block and sanded away any excess or over hang sand down and away from the images edge working in a outward motion from the image's center.


I do not worry about the “proper” order or arrangements of the pieces onto the blocks. They’re meant to
mix and match, so don’t worry about making them all face the same direction on all sides of the blocks.
(It’s impossible to do with 6 sides anyway!)
4) Adhere paper to wooden blocks with mod podge or other adhesive that dries clear. Test your adhesive
agent on some paper scraps (like the Olliblocks logo at the top) to make sure that it does not cause your
artwork to smear. We have found that glossy mod podge remains tacky beyond the proper drying time, so
you may also choose to seal with an acrylic sealer or use matte mod podge. Read an article about this
here: http://www.modpodgerocksblog.com/2009/05/wordle-and-solution-for-mod-podge.html
And tah dah!
You have Olliblocks!


I brushed a final top coat of (matte Modge Podge) on top to seal it all off.
You have yourself a wonderful gift for birthday, baby shower or Christmas.
The best part once you buy the file once you can make as many sets as you want!
I think these would be darling stocking stuffers! I could even see the Elf on the Shelf bringing them. Really if you get most your prsents made early then you dont have to run around town in a frenzy you can just enjoy the sights, sounds, smells, tastes, family and the True Meaning of Christmas. <><
These look great. When you applied the picture over the painted block did you have any trouble with the paint underneath bleeding through the picture or showing through? Just trying to decide whether to leave the block plain or paint prior to application. Thanks for sharing.
ReplyDeleteI had no complications with the paint bleeding through whatsoever :-)
DeleteOne more question. Were you pleased with just printing these from your home printer instead of the print shop suggestion? The quality looks quite nice on my computer screen.
ReplyDeleteI think the print shop was a good suggestion my ink did smear a little from my inkjet... here and there however I'm the person that believes when crafting sometimes our imperfections make it perfect just a like a antique or vintage table...the smears to me gave a vinatgey look and made made it more nostalgic.
Delete